Wednesday, October 27, 2021

Tree elves harvest


I love adding organic items to my mini scenes. Here are some berries the tree elves have been gathering from my garden. The light on the table was made by Jim and Linda Orleff. The wire was run through a small hole I drilled in the center of the tabl. Then I made a tiny trench in the top of the chess piece and ran the wire down the back of that chess piece, under the table and along the front side of the floor to the back of the house.

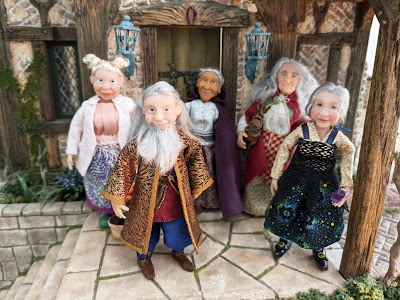
I also found a past photo from the spring I thought I would share. That gorgeous shawl was handmade by Iris Bodenbender. Tiny elves made by me. :)


Sunday, October 24, 2021

Dollhouse mirror kit


I finally placed the shaving mirror I always envisioned on the dresser in my farm house. Ii was a kit by McQueen Miniatures I found a few years ago. I was a very easy to assemble kit and went together beautifully. I staine and varnished it.

Wednesday, October 20, 2021

Tree Elf House in the Evening

When fall approaches I am always drawn to my elf tree house. So I took some evening shots to share. At work I always have to reject beautiful night shots with only the lights on because they just don’t print well on paper and my client prefers crisp inviting photography for their readers. 

But online, they are perfection! There is so much mystery and the shadows bring out textures and create a cozy atmosphere.


The tub was purchased and aged. It was very inexpensive from the fairy garden section. All other furniture was made from scratch.


Instead of stairs they have ladders through holes to each floor. Those tree elves are quick climbers and have excellent balance!
A peek inside the bedroom. The dresser was made from scratch. This scale is just a little smaller than 1:12.
I love that armchair! It was a joy to make and now I need to try and make it in 1:24 scale for a house I have been working on for American Miniaturist magazine. It will be a fun tutorial.
Granny's room is my favorite. Tree elves joke about gnomes and I am sure the gnomes joke about tree elves but when push comes to shove they live in harmony. As you can see a little gnome door weight holds Granny's door open.

The spool of thread was my fathers. He was the son of a tailor so he would purchase fabric while in England on business. Then bring it home and have his tailor make his suits. He had a large collection of buttons and would always repair them if they were loose. He also ended up meeting and bringing my mother to the states from England and then they had me!

The pantry in the kitchen is still empty. So here is where I could use some help. What sort of things should I fill it with? Tree elves live in our world (They are 4-5" tall). They eat natural foods that they forage. They do have a hummingbird nest on their roof so eggs are a great treat. I just have to imagine what they would have on hand and in what sort of containers. Any ideas?

HERE is a postson the stove and cupboard on my old blog.  And HERE is a post showing the structure.

Tuesday, October 19, 2021

Commenting issues

Hello all! It has been so quiet as far as comments, but luckily Jodi Hippler from my-miniaturemadness let me know she couldn’t comment! 

If you are having trouble leaving a comment on this blog or another be sure to clear your cache & cookies. I have been reading that the latest Google Chrome creates commenting issues on Blogger so I cleared mine and have made the comment feature a pop-up window, which has been known to help with Blogger and Chrome. Hope to chat with you all soon!


Little things

 A while ago Charlene, maker of https://www.queenpatricia.com sent me this photo from her studio. I was going to post it on Instagram but time kept slipping by and now IG has disabled both my old account and my newer one. So I thought it would be better to have it here!


Charlene had remembered one of the editor letters I wrote for American Miniaturist and turned my quote into a frames work of art! I am so honored. I never know if my words will help anyone, but always hope they do.


Charlene’s website is most definitely worth a follow. Her and her family have poured themselves into their amazing build. They have also included many pieces from miniature artists. I always look forward to running into them at the Philadelphia Miniaturia show because they are so happy and full of love! See you again this year my friends!

Monday, October 18, 2021

Miniature kits


I finally got a collection of kits I’ve had for a year finished! Does anyone else have a stack of kits? I bet you do! 

The 1:24 wood kits are by Red Cottage Miniatures. I LOVE her pieces! Still need to paint or stain them.


I also have her Black Walnut Cottage just waiting to be constructed for a family of tiny critters I need to make. I am hoping to clear off my work table and start that one this November.


There is also a shaving mirror for the 1930s Farm House and a metal table that needs some aging for a future conservatory that will connect to the Gothic room box! I hope you are all having a fabulous October!


Sunday, October 17, 2021

1:12 sculpted doll

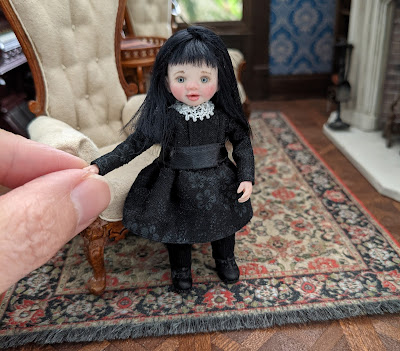
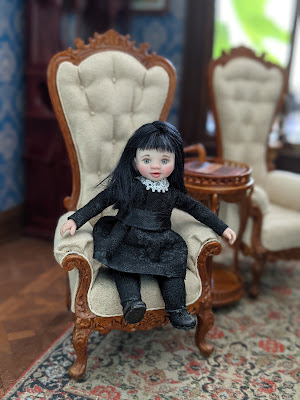
 A beautiful 1:12 doll sculpted by Iris Bodenbender. I wigged and dressed her, but Iris made those sweet tiny leather shoes. She is perfect in my Gothic Revival room box!


Wednesday, October 13, 2021

Thursday, October 7, 2021

Miniature pumpkin plant


I wanted to share a tutorial for my wonderful followers! 

It’s Halloween and anything is possible. I made this fun pumpkin-like plant that has come to life and is hungry.This one is a little fussy, but still fun to make.


Here are all the materials and tools you will need:

Materials:

Sculpy souffle - 6033 pumpkin (Or any orange polymer clay) I like this particular clay because it is not sticky and is just the right color when baked. If you use a different one, bake a sample first because it may change color.

Polymer clay - brown and green

Sculpy translucent liquid

Toothpick

Thin wire

Small pot

Floral foam

Tacky Glue

Wood glue

Tile

Acrylic paint - Bright orange, brown, bright green

Super Glue

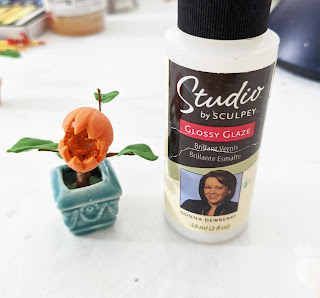
Gloss varnish

Steeped tea

Foam tray

Paper

Yellow crepe paper


Tools:

Clay blade

large and small ball stylus tool

XACTO knife

Foam sculpting tool

Small knitting needle

Needle tool

Spatula

Flower hole punch

Small paint brush

Ruler

Wire cutters

Tweezers


First, knead the clay to get it soft and warm. 


Then make a flat pancake shape.


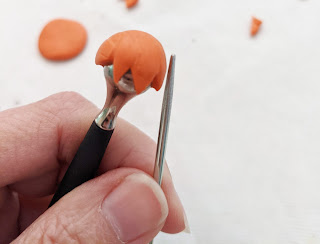
Wrap it over the top of your large ball stylus tool.


Use your XACTO knife to cut the teeth so the longest tip of them is at the halfway point of the ball.

Leave the back straight and push it down a little so the cut is not abrupt.


Use the foam sculpting tool to smooth out the teeth where you cut them.


Draw light indent with the knitting needle so they start in the teeth crease and go to the back. Then make them more prominent with the foam tool.


Slowly wiggle the half pumpkin off the ball stylus.


Repeat again for the other half.


Lay both on wax paper or a tile and thin the backs so you can merge them together and smooth them out with the foam tool.

Use the smaller ball stylus to blend the inside so it stays together. Be careful not to flatten the pumpkin. Don’t press too hard.


Press down a dot of brown clay and use the knitting needle to touch up the edges all the way around. Press into the clay and pull away on the surface.


Use your blade to lift and place it on the back of the pumpkin then press your needle tool through the center to make a hole for your wire.


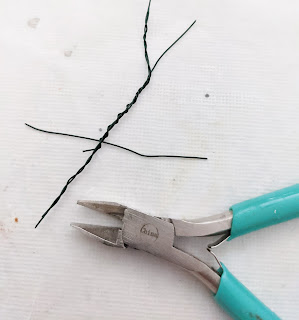
Cut 4-5 pieces of wire. Twist the longest 2 together.


Then twist in one to the same height. This will be for the flower.


Twist on another lower and then another lower than that one.


Place it in your post to determine where to cut the base of it.


Warm up and roll a tube of brown clay and then flatten it and start wrapping it around the thickest part of the wire stem. Leave the very tip exposed.


Sculpt in some lines to look like a vine.


Slip it in the hole on the back of the pumpkin and blend the stem clay into the back.


Be sure it’s in a good shape and bake the head and stem for only 10 minutes at about 240F.


Chop up lots of tiny pieces of orange clay and mix with the Sculpy translucent liquid using a toothpick.


After the pumpkin has cooled, Flatten the wire from the stem that is inside.


Fill it with the mixture. Spread it flat inside to cover the inside of the mouth.

Bake the head and stem following the manufacturer’s temperature directions for 10 minutes. 


Pour wood glue or Tacky Glue in your pot and push in some floral foam.


Press some green clay on a tile very thin and shape it like a pumpkin leaf or similar. This is a fantasy plant so you have some freedom.


Scrape up each leaf with your clay knife and shape it with your fingers and then make a veins with the knitting needle. Lay on crumpled foil to bake them. I use the foil when I want to be sure the tile doesn't leave a shiny surface on the clay that touches it while baking.


Run some Tacky Glue along the wire branches and place in front of a fan. Keep an eye on it to be sure it doesn’t bubble. Let dry.


Paint the entire stem brown.


Paint the inside of the pumpkin and along the edges of the teeth in a very bright orange.


Push it in the foam to be sure it is at an angle where your pot won't tip over with the weight of the pumpkin.


Take it out and pour some glue in the hole and press it back in. Let it set.


Bend and shape the stems where you want them and put a small dot of Super Glue on the stems and place on the leaves with tweezers.


Paint inside the mouth with a glossy varnish.


Paint some bright green on the leaves and blot it off with your fingers.


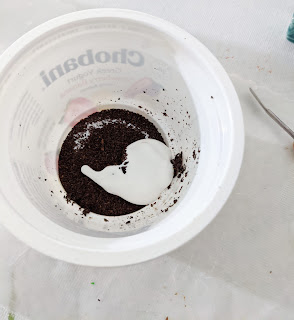
Mix some steeped tea and white glue.


Push the mixture into the pot. Let it dry.


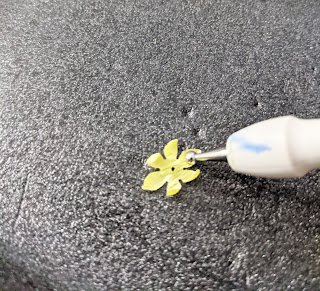
Put paper on either side of the yellow crepe paper and punch out a flower. The paper keeps the thin crepe paper safe while in the punch.


While the crepe paper is still stuck to the regular paper, push a needle tool through the center.


Separate the papers.

Use a small ball stylus tool to curl up all the petals. 


Then flip it over and rub the center. You may have to press the needle tool through the hole again.


Put a dot of white glue in the top stem and push on the flower with tweezers.


Mix some watered down orange paint and put it on the center of the flow so it bleeds through.


You're done!!