Friday, December 24, 2021

Antique Dollhouse

I wish you all a magical holiday season! A big thank you to all that have been following this new blog and to all that have been following me for so many years through my other 2 blogs.

This next year will be filled with many more projects and experiments!


My 1920s Schoenhut Bungalow was decorated for Christmas. 

I added a sled and a wagon to the porch because when I was little these are the two things I would always ask Santa for. I had a humble childhood so to have a sled was something I dreamed about. I never got one but my mom found giant metal trays at the charity shop and they were as fast as lightning! 


I vividly remember talking to Santa on the phone and asking him for a wagon. I was so very shy when I was a child. I hid behind a Mexican blanket that was hung on our dining room wall while I spoke to ’Santa'. I was so excited and thought for sure I would get that wagon!


Turned out it was a friend of my father’s and I guess the message wasn’t translated to my dad. But no worries, I bought my own wagon as an adult and used it in the garden.


I believe that taking care of your inner child is one of the keys to being truly happy.


Tiny dollhouse by Hubert Lengdorfer


Wednesday, December 22, 2021

A dollhouse fireplace from mat board


This is a great way to get a custom fireplace in any design.

First, I cut the two curved sides after drawing a template on paper and tracing it onto mat board.


Above you can see I also cut the top front and side pieces.


Once you decide on your width, cut a spacer and glue it in-between in the top and bottom of the curved sections.


Then add a little wood glue to attach the top sides. Then glue on the front.


Once your two curved sides are framed and dry, line them up and determine how wide you want the fireplace face. Then cut the front pieces out and place them in-between. I added glue to their edges and placed them in and used foam board and wood scraps to keep them at the height I wanted while they dried.


Next, get some Bristol board and mark the width at the top and bottom of the curved sides. Cut it out.


Score lightly with your knife for the bottom where the curve goes straight to the base.


Hold it on the curve and determine if it needs to be trimmed before gluing.


Run some wood glue along the curved sides and hold the Bristol board down while smoothening it to adhere to the curved frames until it sticks.


Glue on any decorative elements and then glue on the mental top. I gave it a light grey and white dry brush effect by loosely mixing grey and white and brushing it on quickly. Shown here before painting.


This is the start of the upstairs fireplace. I started with the fireplace face then determined how deep I wanted it and cut the sides. Then I cut the inside frame work.


After it is assembled I add decorative elements and trim.


Paint with a base coat and use wood glue to fill in any holes. Then sand with fine sandpaper to smooth out any rough areas.


I wanted some crackle on the upstairs fireplace, so I brushed on some dark grey and let it dry. Then I brushed the crackle medium on and let it dry. Then I painted white all over the piece and let it crack!


A friend gave me a sample of this textured brick paper. I brushed some black pastel on them and also on the insides of the fireplaces and will glue that to the wall. Then will glue the fireplaces on after I make the hearth.


But first I have to install the herringbone wood flooring. Stay tuned!

Thursday, December 9, 2021

Dollhouse room box windows and door


This room box has become an experimental project for me. While making my stone cottage I found a cool Golden product that was basically fine sand in a gel medium. So when I put it on the entrance addition of the stone cottage it looked like coarse stucco. It was very expensive, even with a coupon, so I decided to try to make something similar.


I mixed sand with watered down Tacky Glue (because I had it on hand) and added regular white glue that I had. First I tried to spread it on with a painter's spatula but it was too thick so I ended up applying it with the spatula and letting it run down the sides as it thinned itself out and I kept spreading out the drips.


In the end, I think my sand was not fine enough and it was a failure. But if you wanted a very coarse texture for something it could work. I saved the project by applying spackle and sanding down with an electric sander.


I did want it to be rustic so the combination of the sand and the spackle turned out kind of nice!


Then I got to work on the windows. These Bonnnet Pediment windows by Hobby Builders Supply are great! You can easily take them apart, paint and sand them and put them back together.


Be sure to sand the front, side and back of the window frames that fit in the groves and also to sand the groove all with very fine sandpaper so they slide easily. Also keep the paint thin and sand as it dries for each coat. The extra work is worth it!


To clean the acrylic 'glass' either blow through a straw, use air in a can or use an airbrush. Wiping them will scratch them!


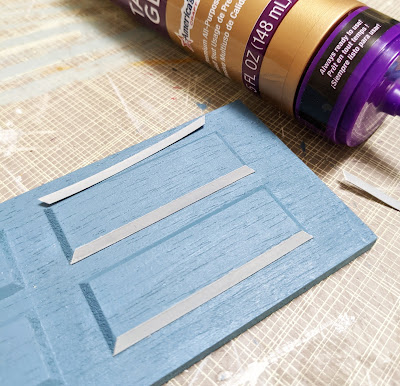
For the door, I wanted to add two tones to the panels so I painted strips of cardstock. Then I cut and glued them on the beveled edges. Then added some paint in any gaps of the corner joins.


The door also comes apart. Just pull out the bottom pin and be sure to save it somewhere safe while you are painting. You could even tape it to the table to be sure it doesn't run away!


The door pediment was a little wider than I thought because I ordered the wrong one. This was an easy fix, I just cut strips of thick basswood and put them on either side of the door.


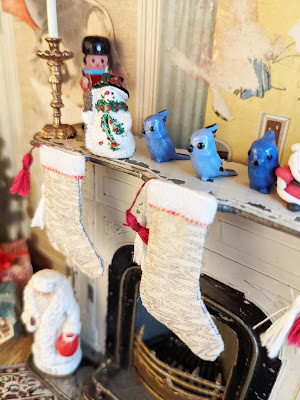
I am so happy with this so far! This project is not meant to be a replica of a real house. I decided to make it more of a shell to showcase miniature treasures. Two simple rooms and an attic will be enough space to make a living room and bedroom and we will see what the attic turns into.


This project began as a simple room box from Hobby Builders Supply. See my earlier bog to learn more. I hope everyone has a wonderful holiday season. Coming up next will be some fabulous flooring! I will get back to this project in January. Happy Holidays!!