Thursday, October 7, 2021

Miniature pumpkin plant


I wanted to share a tutorial for my wonderful followers! 

It’s Halloween and anything is possible. I made this fun pumpkin-like plant that has come to life and is hungry.This one is a little fussy, but still fun to make.


Here are all the materials and tools you will need:

Materials:

Sculpy souffle - 6033 pumpkin (Or any orange polymer clay) I like this particular clay because it is not sticky and is just the right color when baked. If you use a different one, bake a sample first because it may change color.

Polymer clay - brown and green

Sculpy translucent liquid

Toothpick

Thin wire

Small pot

Floral foam

Tacky Glue

Wood glue

Tile

Acrylic paint - Bright orange, brown, bright green

Super Glue

Gloss varnish

Steeped tea

Foam tray

Paper

Yellow crepe paper


Tools:

Clay blade

large and small ball stylus tool

XACTO knife

Foam sculpting tool

Small knitting needle

Needle tool

Spatula

Flower hole punch

Small paint brush

Ruler

Wire cutters

Tweezers


First, knead the clay to get it soft and warm. 


Then make a flat pancake shape.


Wrap it over the top of your large ball stylus tool.


Use your XACTO knife to cut the teeth so the longest tip of them is at the halfway point of the ball.

Leave the back straight and push it down a little so the cut is not abrupt.


Use the foam sculpting tool to smooth out the teeth where you cut them.
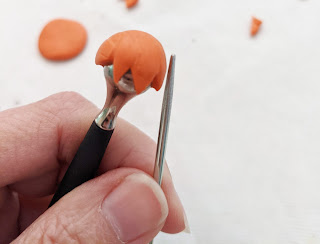


Draw light indent with the knitting needle so they start in the teeth crease and go to the back. Then make them more prominent with the foam tool.


Slowly wiggle the half pumpkin off the ball stylus.


Repeat again for the other half.


Lay both on wax paper or a tile and thin the backs so you can merge them together and smooth them out with the foam tool.

Use the smaller ball stylus to blend the inside so it stays together. Be careful not to flatten the pumpkin. Don’t press too hard.


Press down a dot of brown clay and use the knitting needle to touch up the edges all the way around. Press into the clay and pull away on the surface.


Use your blade to lift and place it on the back of the pumpkin then press your needle tool through the center to make a hole for your wire.


Cut 4-5 pieces of wire. Twist the longest 2 together.


Then twist in one to the same height. This will be for the flower.
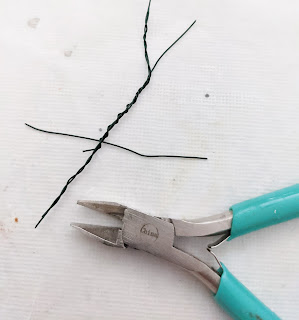


Twist on another lower and then another lower than that one.


Place it in your post to determine where to cut the base of it.


Warm up and roll a tube of brown clay and then flatten it and start wrapping it around the thickest part of the wire stem. Leave the very tip exposed.


Sculpt in some lines to look like a vine.


Slip it in the hole on the back of the pumpkin and blend the stem clay into the back.


Be sure it’s in a good shape and bake the head and stem for only 10 minutes at about 240F.


Chop up lots of tiny pieces of orange clay and mix with the Sculpy translucent liquid using a toothpick.


After the pumpkin has cooled, Flatten the wire from the stem that is inside.


Fill it with the mixture. Spread it flat inside to cover the inside of the mouth.

Bake the head and stem following the manufacturer’s temperature directions for 10 minutes. 


Pour wood glue or Tacky Glue in your pot and push in some floral foam.


Press some green clay on a tile very thin and shape it like a pumpkin leaf or similar. This is a fantasy plant so you have some freedom.


Scrape up each leaf with your clay knife and shape it with your fingers and then make a veins with the knitting needle. Lay on crumpled foil to bake them. I use the foil when I want to be sure the tile doesn't leave a shiny surface on the clay that touches it while baking.


Run some Tacky Glue along the wire branches and place in front of a fan. Keep an eye on it to be sure it doesn’t bubble. Let dry.


Paint the entire stem brown.


Paint the inside of the pumpkin and along the edges of the teeth in a very bright orange.


Push it in the foam to be sure it is at an angle where your pot won't tip over with the weight of the pumpkin.


Take it out and pour some glue in the hole and press it back in. Let it set.


Bend and shape the stems where you want them and put a small dot of Super Glue on the stems and place on the leaves with tweezers.

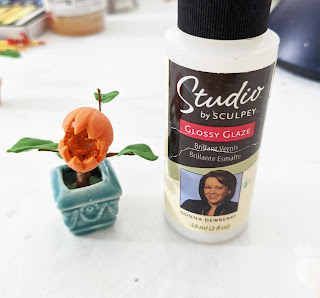


Paint inside the mouth with a glossy varnish.


Paint some bright green on the leaves and blot it off with your fingers.
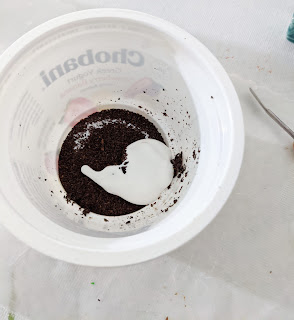


Mix some steeped tea and white glue.


Push the mixture into the pot. Let it dry.


Put paper on either side of the yellow crepe paper and punch out a flower. The paper keeps the thin crepe paper safe while in the punch.


While the crepe paper is still stuck to the regular paper, push a needle tool through the center.


Separate the papers.

Use a small ball stylus tool to curl up all the petals. 
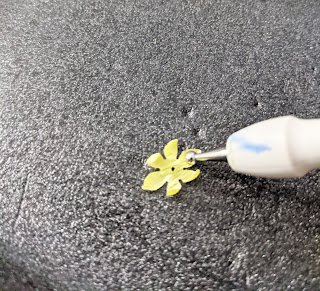


Then flip it over and rub the center. You may have to press the needle tool through the hole again.


Put a dot of white glue in the top stem and push on the flower with tweezers.


Mix some watered down orange paint and put it on the center of the flow so it bleeds through.


You're done!!


Monday, September 20, 2021

Tuesday, September 14, 2021

Miniature French cottage horse stable


The stable is attached to the side of the cottage. This was my first time making "dirt". I did it a little different the second time for the Timber Cabin, but here are the directions: Click here!


I designed the side of the stable to open with hinges. The roof is in the process of being attached. The roof is gator board. For those that have not worked with gator board, it is basically foam board but with a hard plaster shell. It will not warp and is still light weight. I highly recommend cutting it with a power saw and not by hand with a utility knife. Too many cuts injured my rotator cuff while making the walls for this cottage!


I need to make a sable stand for this beauty! I will post a tutorial here for that. I got the saddle at Karen's Dollhouse Shop in NJ.


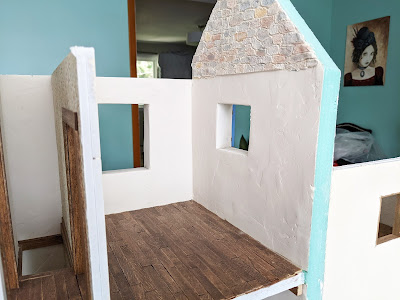
The bottom door swings open but the top is glued to the wall. I love all the different textures surrounding this stable.


There is a loft inside that will have a ladder.

There is a 'concrete' ramp to make it easy for the wheel barrow and other equipment to go in and out. I am still doing research to gather ideas for items that need to be in here. I have never had a horse so I have some fun things to discover.

Until next time!


Thursday, August 19, 2021

French Stone Cottage

Now that the Timber Cabin is finished and sold, it's time to get back to the French Stone Cottage! This is the project that injured my rotator cuff while cutting gator board with a knife too many times. I strongly advise using an electric saw when you have to cut gator board! 

It's almost 2 years later and for the most art my arm has healed. Kaiser Permanente was no help during Covid so I found and downloaded a treatment online and took care of it myself. Which turned out to be a good thing because I learned that if the doctor knew I had rotator cuff issues it would go on my record and I would have a hard time finding a different insurance group because they share EVERYTHING! Crazy! Anyway back to fun things...

In this post I will share a little bit about what I have done and what the future plans are. This house was my design and made from insulation foam and gator board. The stone work was sculpted from PaperClay and then painted.


The door and shutters along with the hardware were all handmade. That color took a long time to get just right and I'm so happy with it! The windows still need to be constructed.

I remember making the stone walls from PaperClay in the middle of severe thunderstorms. I moved my work station to my living room because that is the side of the house where there are no trees that could fall on me. Then the lights went out, so I lit a few candles and continued sculpting through the chaos. That definitely kept me calm and focused! I shared a tutorial for the stone wall in American Miniaturist issue 209-210 (this was a jumbo issue).


I knew I wanted a small stable for one horse in this house, something I've never tried before. I made the side so that it would open to insert a horse and take better photos. The 'dirt' was made by sifting real dirt and mixing it with grout. Then the floor was sprayed with glue/water and after the mix was applied, it was sprayed again. The little stable doors are on working hinges. One of the first time I got mini hinges to work when installing them!


This shows the inside of the house. I made it as small as possible because I wanted it to be cozy. I imagine an elderly man lives here and it's his happy little sanctuary. Peaceful and simple out in the country. The floors were made with wood filler and then painted. See the tutorial on my older blog here.


My signature in my builds, since my first one in 1999, is to add one wall with a William Morris design. The stair well was the perfect spot because it was a difficult place to apply wall stucco. I have been drawn to his intelligent designs since I discovered him in art college. That fabulous leather chair was purchased at Karen's Dollhouse Shop in Clinton New Jersey. If you are even up to 3 hours away, you need to visit her! Such a cool hip town and the shop is incredible! Not to mention, she is such a sweetheart.


First thing to do will be to add the ceiling. I want a storage attic above the hall and bath with a hinge drop down ladder. The bedroom will have a vaulted ceiling with wood beams and wood slats.


The fireplaces were hand-sculpted and painted in both the living room (above) and the bedroom (below). 

So that is where we are now. I hope you will stay tuned as I finish up this sweet little cottage! The roof and electric will be first, then I will make a little garden outside and a stone walkway.

Monday, August 9, 2021

Dirt for Miniatures


Today I will be sharing how to make faux dirt in miniature. There are so many ways to do this in the diorama world and many products you can use. As always, I opted to use what I have in my magical basement. One of my friends is fascinated with my basement and all the materials it holds. Funny, because it is pretty tidy but I have a lot of home improvement tools and materials on the shelves.


In the very back of my basement I have a room with left over tiles, grout and some mortar. Grout is something I have used before for faux dirt but this time I am using mortar instead of going out in the summer heat to sift up some dusty dirt, which is a great option if you don’t have mortar.


The grout needs to be a light grey or brown color. I mixed them together. The mortar was a little chunky so I crushed it a little, but kept some of the texture for this project. If you don’t want any chunks, crush it up and pour it into a spray can cap. Use a rubber band to fasten some tulle fabric to it. Then when you shake it, it will come out fine.


Get a small spray bottle and add a mix of water and plain white glue (not tacky). You want it to be watery not thick. Shake it up and spray the surface where you will be applying “dirt”. I am using a scrap sheet of gator board for this demonstration.


FYI - The area I am applying dirt is under the Timber Cabin deck and hard to photograph. I had to sprinkle the mixture with a spoon because there was no room to shake the lid full of “dirt”. I also used a small piece of card stock to protect the stone work when I sprayed the glue mixture onto the surface area.


Shake your cap full of the mixture over the wet glue mixture until it is covered. Let it soak in. Once it is dry, if you see uncovered areas, you can repeat the process. I painted my base a dirt color before I started because it was a difficult space to be able to see if every little section was covered. I sprayed a top coat as well.


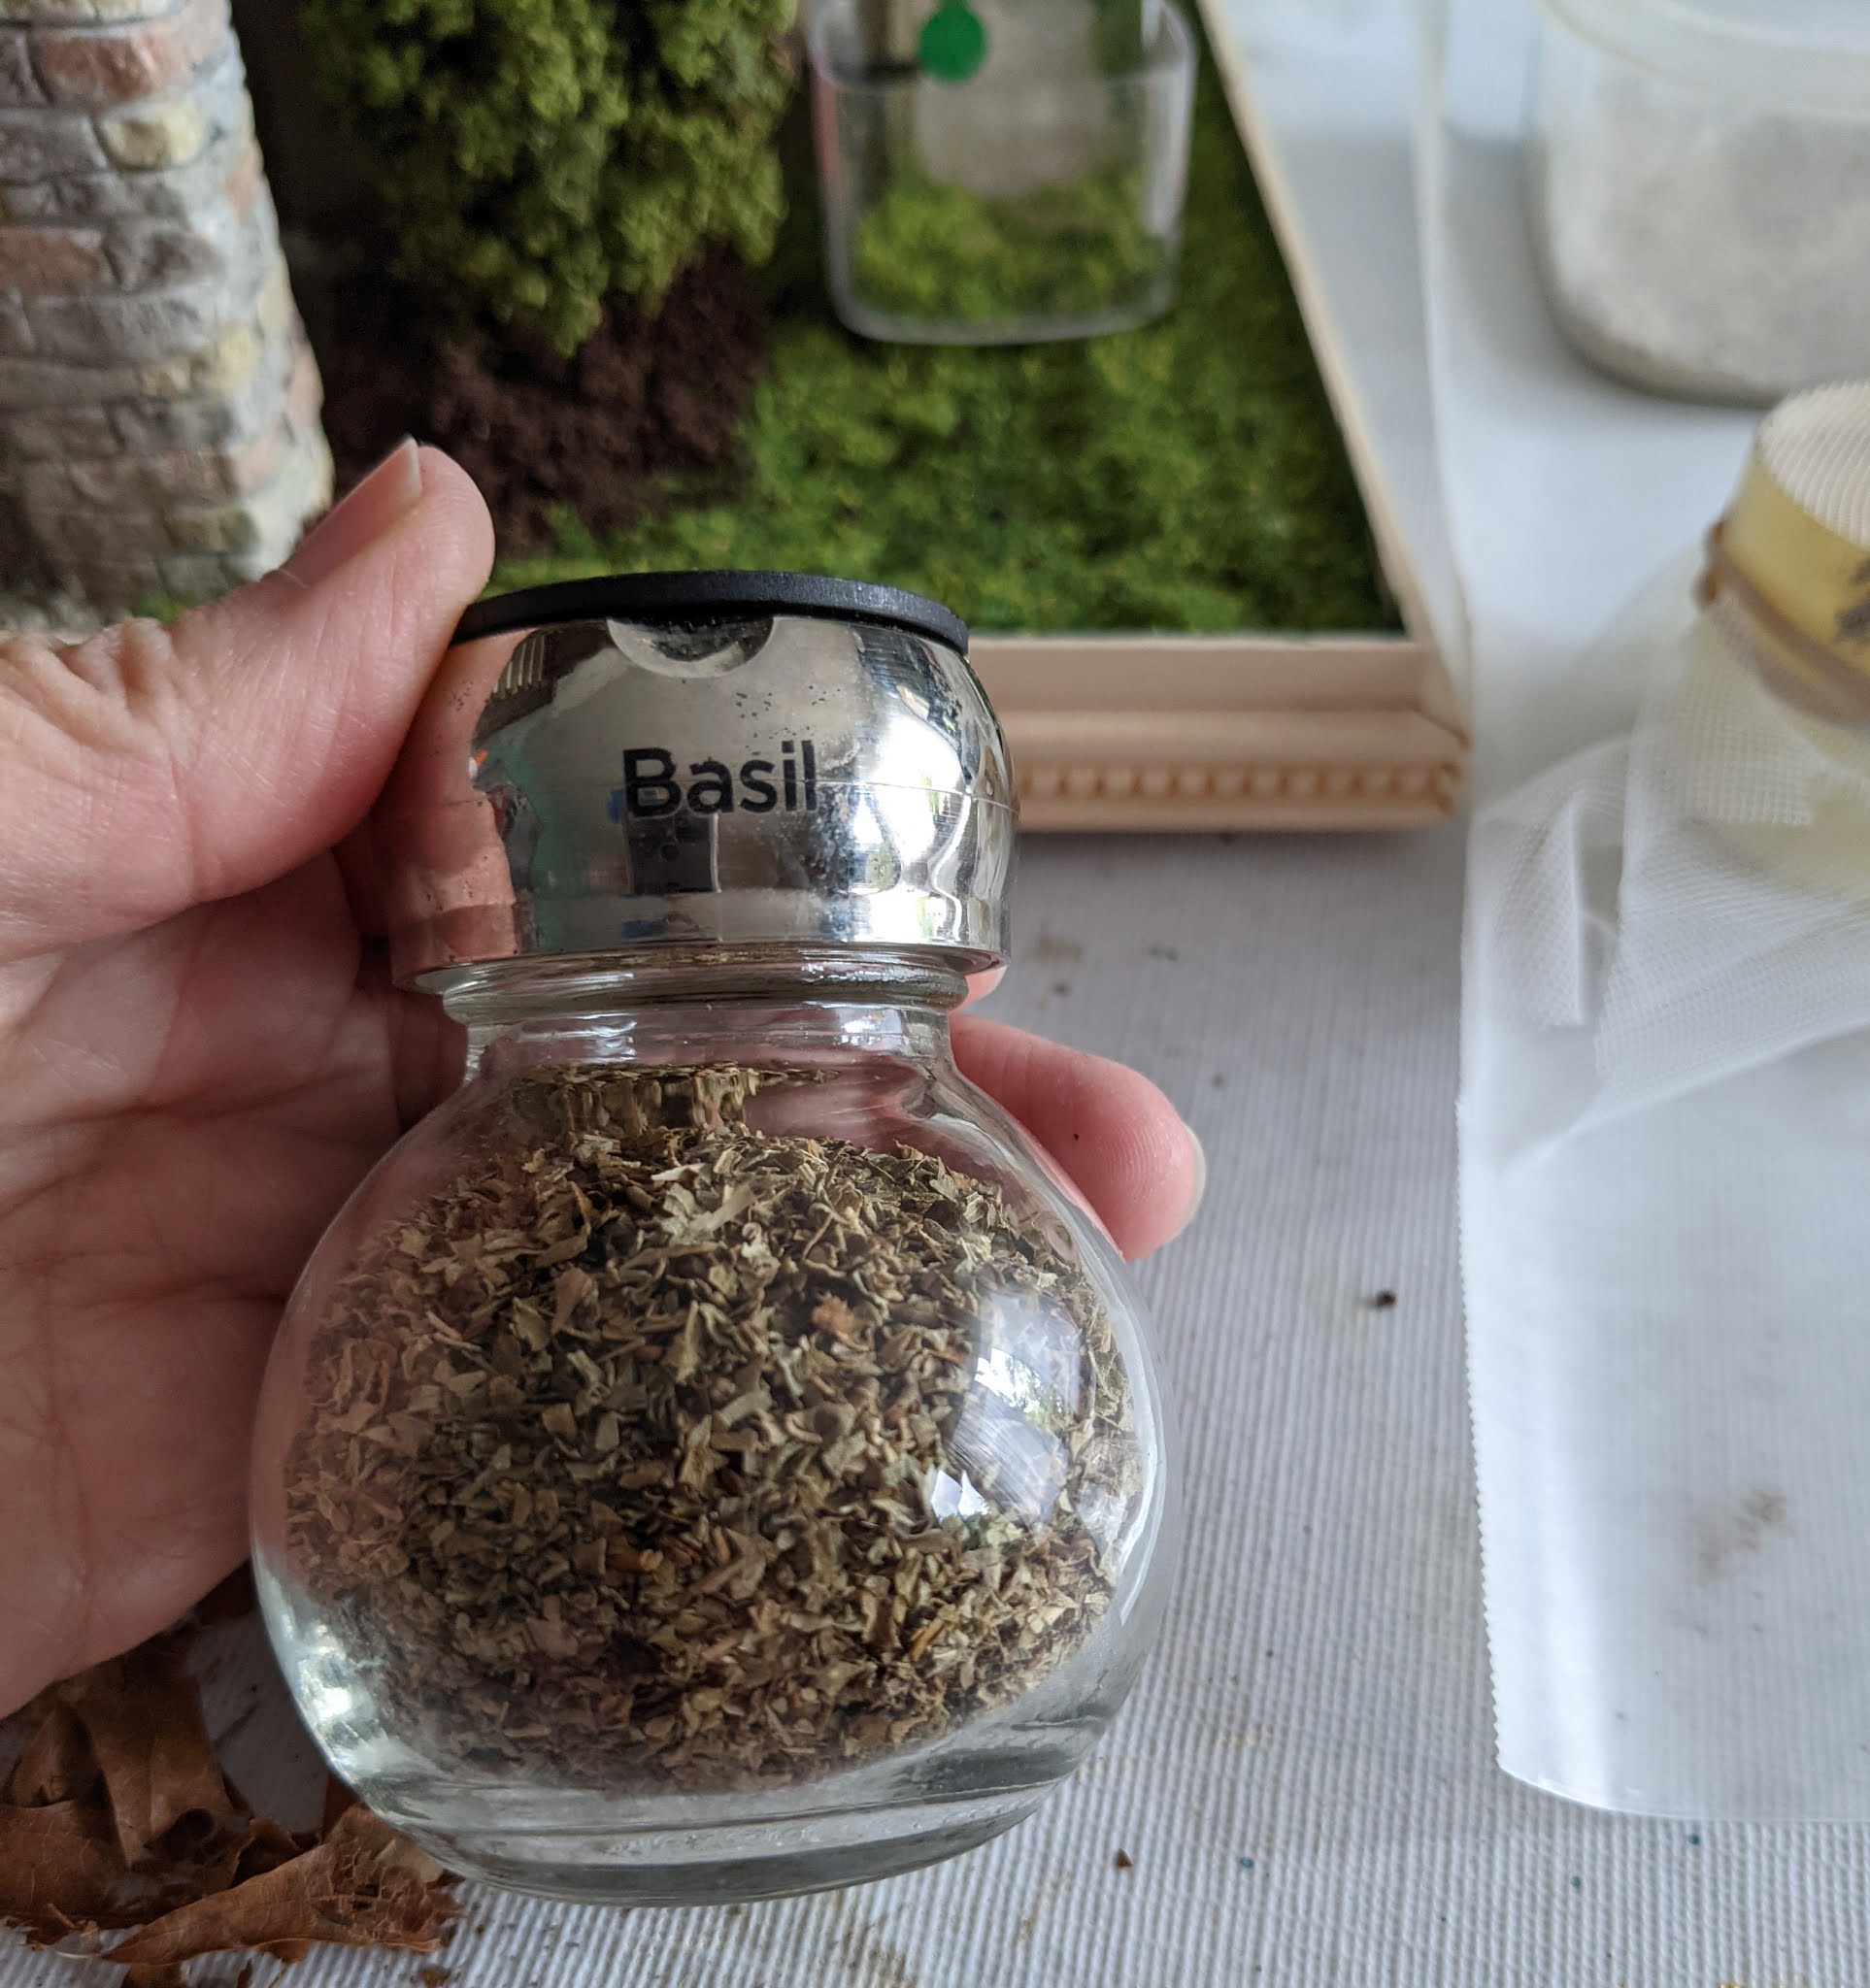
Depending on how much realism you want, you can also crush some real leaves and herbs and sprinkle them on top of the dirt. I added some crushed maples leaves and basil. I blew in the basil off my hand so it spread out under the deck. I added some white glue along the edge of the stone work and pressed the crumpled leaves in it and let them dry. I also found some tiny rocks and glued them in. Get creative and add all sorts of things to your dirt!


Crushed maple leaf

Basil


If you want a touch of grass here and there you can get these easy to use grass tufts. They come in different colors! I used them at the base of my steps.


Have fun creating!

Monday, August 2, 2021

Timber Cabin has lights!


Here are a few fun photos showing the Timber Cabin with the lights on! I made a secret door to get to the controls. It is secured by a magnet and will have the same wood treatment as the all the sides of the base. I will share some photos of it finished in a future post. 


I used wire lighting for this project because of the timber on the wall. This way the wires were able to be tucked in under the timber and behind the window/door frames. The kitchen light wires were then pushed through a hole I drilled to the ‘basement’.

The upstairs has a wall plug so the future owner can easily switch out the lamp if they desire. Once the fire place light comes I will install that as well. 


Now I move on to putting 'dirt' under the porch deck!