
Back in the summer of 2019 I started to make my French stone cottage. The photo above is where it is at the moment.
I have pulled out older photos to share my progress here on my blog from the start.

I used foam board and gator board. The base of the property is 1/2” thick gator board.
The entire inside was covered with stucco and the outside with paper clay. I framed out the ceiling and door frames with basswood.


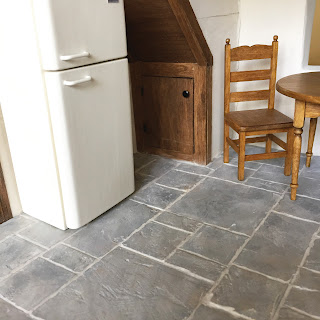

Click HERE to visit my older blog site and see how I made my stone floors.


The front door...

I made a custom door using mat board. First I cut the size of the door from mat board with the hole cut out for the window. I have Plexiglass in the hole (it still has its protective film on it).


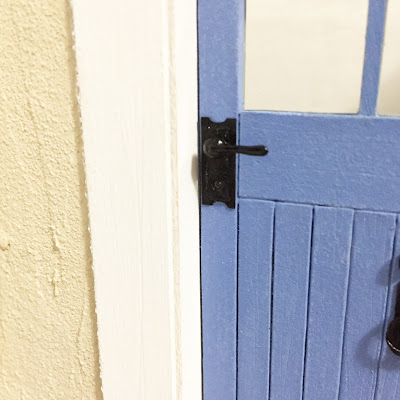
Then I added a little mailbox beside the door!
This is how I did it…


First, I cut a 2cm strip of black card stock. Then I decided on my width and folded it back against my metal ruler using my fingernail. Continue to do the same for the sides and the back.
Fold so the back pieces meet and trim off any extra so they overlap.


Add some Tacky Glue and press the inside with your blade to get the glue to adhere. Hold between your thumb and finger to be sure it’s square. If needed, wiggle until it’s square before it dries.


For the back plate, lay the box on the card stock and determine the size. Leave room at the top for a slanted lid.
Put Tacky Glue along the bottom edges of the box and place it on the card for a base. Remove excess glue with your fingernail or a toothpick. Let dry. Then trim away the extra card with small sharp scissors.

Draw out a design with a pencil and cut it out using curved scissors/
cutting knife. Set aside.


For the lid, gently score the black card for the front fold.


I folded up the sides and sliced them to an angle then glued the front tabs inside of them.
Hold your lid on the front of the mail box to determine the slant of the lid and cut the sides to aligned with the box.


Cut a piece of card the width of the inside of the lid. Note that the piece shown was too short. Cut a little longer for the back.
Score it so the top flap will fit inside the lid. Glue the shorter part above the score line to the inside of the lid. Glue the taller side to the back of the box. Let dry and flip the lid up/down to get it flexible.


Run the Elmer’s white glue nozzle along the edge of the back plate. Use a toothpick to make clean lines. Let dry. Then add another layer the same way.

Add some decorations to the bottom of the back plate, lid and front of box with white glue. As it dries, press a toothpick in it and move the glue around to make a random design. You are creating an illusion. The viewers subconscious will tell their brain that this design is an antique mailbox design.
Glue the lid tab to the back of the box and let it dry.


I pushed in the side lid tabs and had to fiddle with it to get it to stay down. So just for added help, I added more glue to the sides to make the lip of the box stick out a little more to give the lid something to get hung up on. I also added a little more decorative glue design to the top front of the box.
Paint the entire thing with gloss or matt black paint. A newer box might be shiny while and older one may be weathered with a little rust. For rust, just use a very fine brush to dry brush on some terra-cotta colored paint. Just a tiny bit will do it.
Hang your little mail box up!

Be sure to follow this blog to see more of the cottage! Thanks for stopping by.


Thanks for all your tips and instructions! To make raised designs on cardstock, you may want to try an embossing ink pen and some embossing powder. This gives a beautiful raised enameled effect and lets you be quite precise with the drawings. You can even add a second layer of powder for a more embossed result. Just be sure to choose a slow-drying ink and a very fine powder. I’ve come to love this method and use it a lot (I’m a paper-and-card lover myself).
ReplyDelete