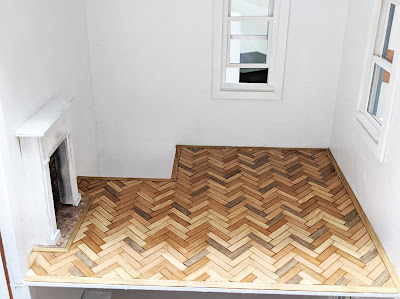
I have been working with Parish Bleau from BleausCustomWoodWork to make a herringbone floor kit.
If you have a custom idea for your dollhouse or room box floor, Parrish is the man to talk to. Check out his Etsy shop and get in touch with him if you need some flooring for your project! He will work with you until you have exactly what you need and loves a new challenge!


After researching how to install a real herringbone floor I came up with just the basics for a dollhouse. I never knew how much math was required to install a full scale herringbone floor! Yikes!
If your raw base is a light color and you are installing a dark floor be sure to paint the base first to match and let it dry.
First, frame out your room with the border planks.


Find the center of your room and draw a line. I drew two more to help guide me.


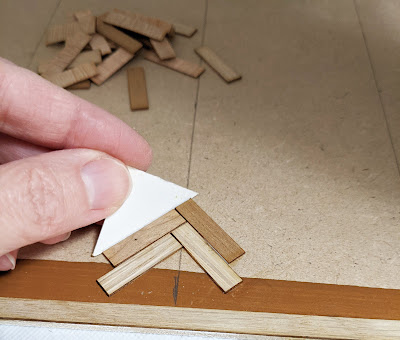

Now start stacking towards the back of the room paying attention to your guideline and pushing the planks with the template to be sure they stay snug to each other.

Once you have the center finished, start stacking the planks on each side. Mine did shift a little and sometimes I had to trim the planks to be more narrow to fit, but for the most part it stayed lined up.

When you get to the side of the border, line up about 3-4 planks at time and mark the trim line with a pencil. Take them out and trim with scissors. Keep going until you fill the entire area.


Next up will be the brick foundation!


Un gran trabajo ,Feliz Año nuevo
ReplyDeleteLooks beautiful. You make it look so easy.
ReplyDeleteHas hecho un precioso trabajo con ése suelo,queda fantástico!
ReplyDeleteBesos.