I wanted some distressed brick at the base of my room box and Hobby Builders Supply hooked me up!
This is the product I am using…Common Joint Pattern Brick Sheet
In the past I have made brick from scratch using PaperClay, foam or wood filler. This time I thought I would go back to a product I used when I first started miniatures many, many years ago.
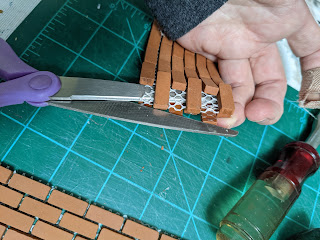
These brick sheets are very easy to work with. The clay bricks are glued to the mesh, but can be easily removed if needed. The mesh can be cut with scissors.
To start with, I built a wood base for my room box then measured the height and cut strips of the brick. Starting with one side at a time, I lined up the strips and figured out how the corners would meet.
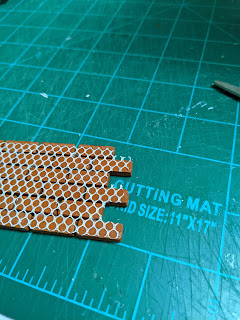
First, I just folded the brick mesh over a corner and let the mesh peel away from the brick. Then I cut the mesh around the brick. Next, I lined up my 2nd strip to fit into the corner like a puzzle and trimmed away the mesh.
I held both strips in place and marked them with a pencil where they needed to meet to be flush.
Then I transferred the marks I drew on the front to the back of the bricks. I flipped over the strip so it was front-side-down on my cutting board.
Line up the chisel just behind that line. (When the chisel is hit with the hammer the brick will break at an angle. This way when you flip it over your break will be closer to the line you drew.)
Note: If you have a saw that cuts stone or ceramic, you can use that to get a precise cut. I am making a distress base so I wasn’t worried about perfection.
Some corners will require you cut individual bricks to fill in holes at the corners. If you're using a chisel you need to cut a long strip of meshed brick and cut the end brick then peel it off. Otherwise your usable brick piece will fly away!
Glue down your pieces with wood glue. I glued one side and let it set for 15 minutes, then flipped the house over and glued the next side and so on.
I also got some mortar mix from Hobby Builders Supply. You can find it HERE.
Mix it in a bowl with water until it is slightly runny. Here is the trick…it needs to be a little more runny than what you are comfortable with because once it contacts the bricks they suck up all the water very quickly and you will have trouble getting the mortar in the cracks.
Spatula it on and press it down immediately. I used an old silicone spatula because it has some flex to it and helps get the motor into the cracks. Do a small section at a time. Once the mortar has seized up, use a metal spatula to cut the excess away and put it back into your bowl. Just scrape it flat and cut into the mortar. You will be adding more water, adding more mortar powder in your bowl as you go. Just a little at a time so you don’t waste.
Run a damp sponge over each area to clean up any excess and rinse the sponge under the faucet into a bowl. (Don’t pour the water down your drain! When you are finished or the bowl is full, dump it out the window or walk it outside).
I ran my finger over the brick after the sponge to press any extra mortar into the cracks. Let it dry overnight.
I wanted an old distressed paint job on mine so I brushed some white craft paint over it with a medium brush, careful not to cover everything and to leave some red brick showing. Let it dry.
Then I used an old small brush and dabbed some thick paint blobs over some of the brick that was all white, still being sure to leave some brick uncovered. TIP:Keep your old brushes. They really do come in handy for certain textures.
Next up, I will be making the porch/steps…


Love those bricks.
ReplyDeleteHan quedado con un aspecto muy real!
ReplyDeleteBesos.